Build your blog with hexo and deploy to GitHub
Build your blog with hexo and deploy it to GitHub Pages
Preamble
Maybe you want to have your own website and your own blog, but don’t want to start from the beginning? Well, you can build your blog with hexo and github pages, which is free and easy to use!
Follow these steps and you can have your own blog!
Step 1. Install node.js and git
On macOS, git should be preinstalled as long as you have Xcode downloaded, whilenodejs can be installed with brew:
1 | |
You can execute node -v , npm -v , git --version to check if you have correctly installed these.
Step 2. Prepare your GitHub Account.
Register and set username & email
First, of course, you need to register a GitHub account (with your email). Note that the username will be your prefix of the website, so choose the username carefully. For instance, my username is billhu0 and my website domain will be billhu0.github.io.
Then, go to terminal and run the following:
1 | |
Replace <Your_github_name> and <Your_github_email> with your github name and github email.
Add an SSH public key
First, create an SSH key. In terminal,
1 | |
You may need to type y or yes according to the prompts.
Then, copy the text in file ~/.ssh/id_rsa.pub.
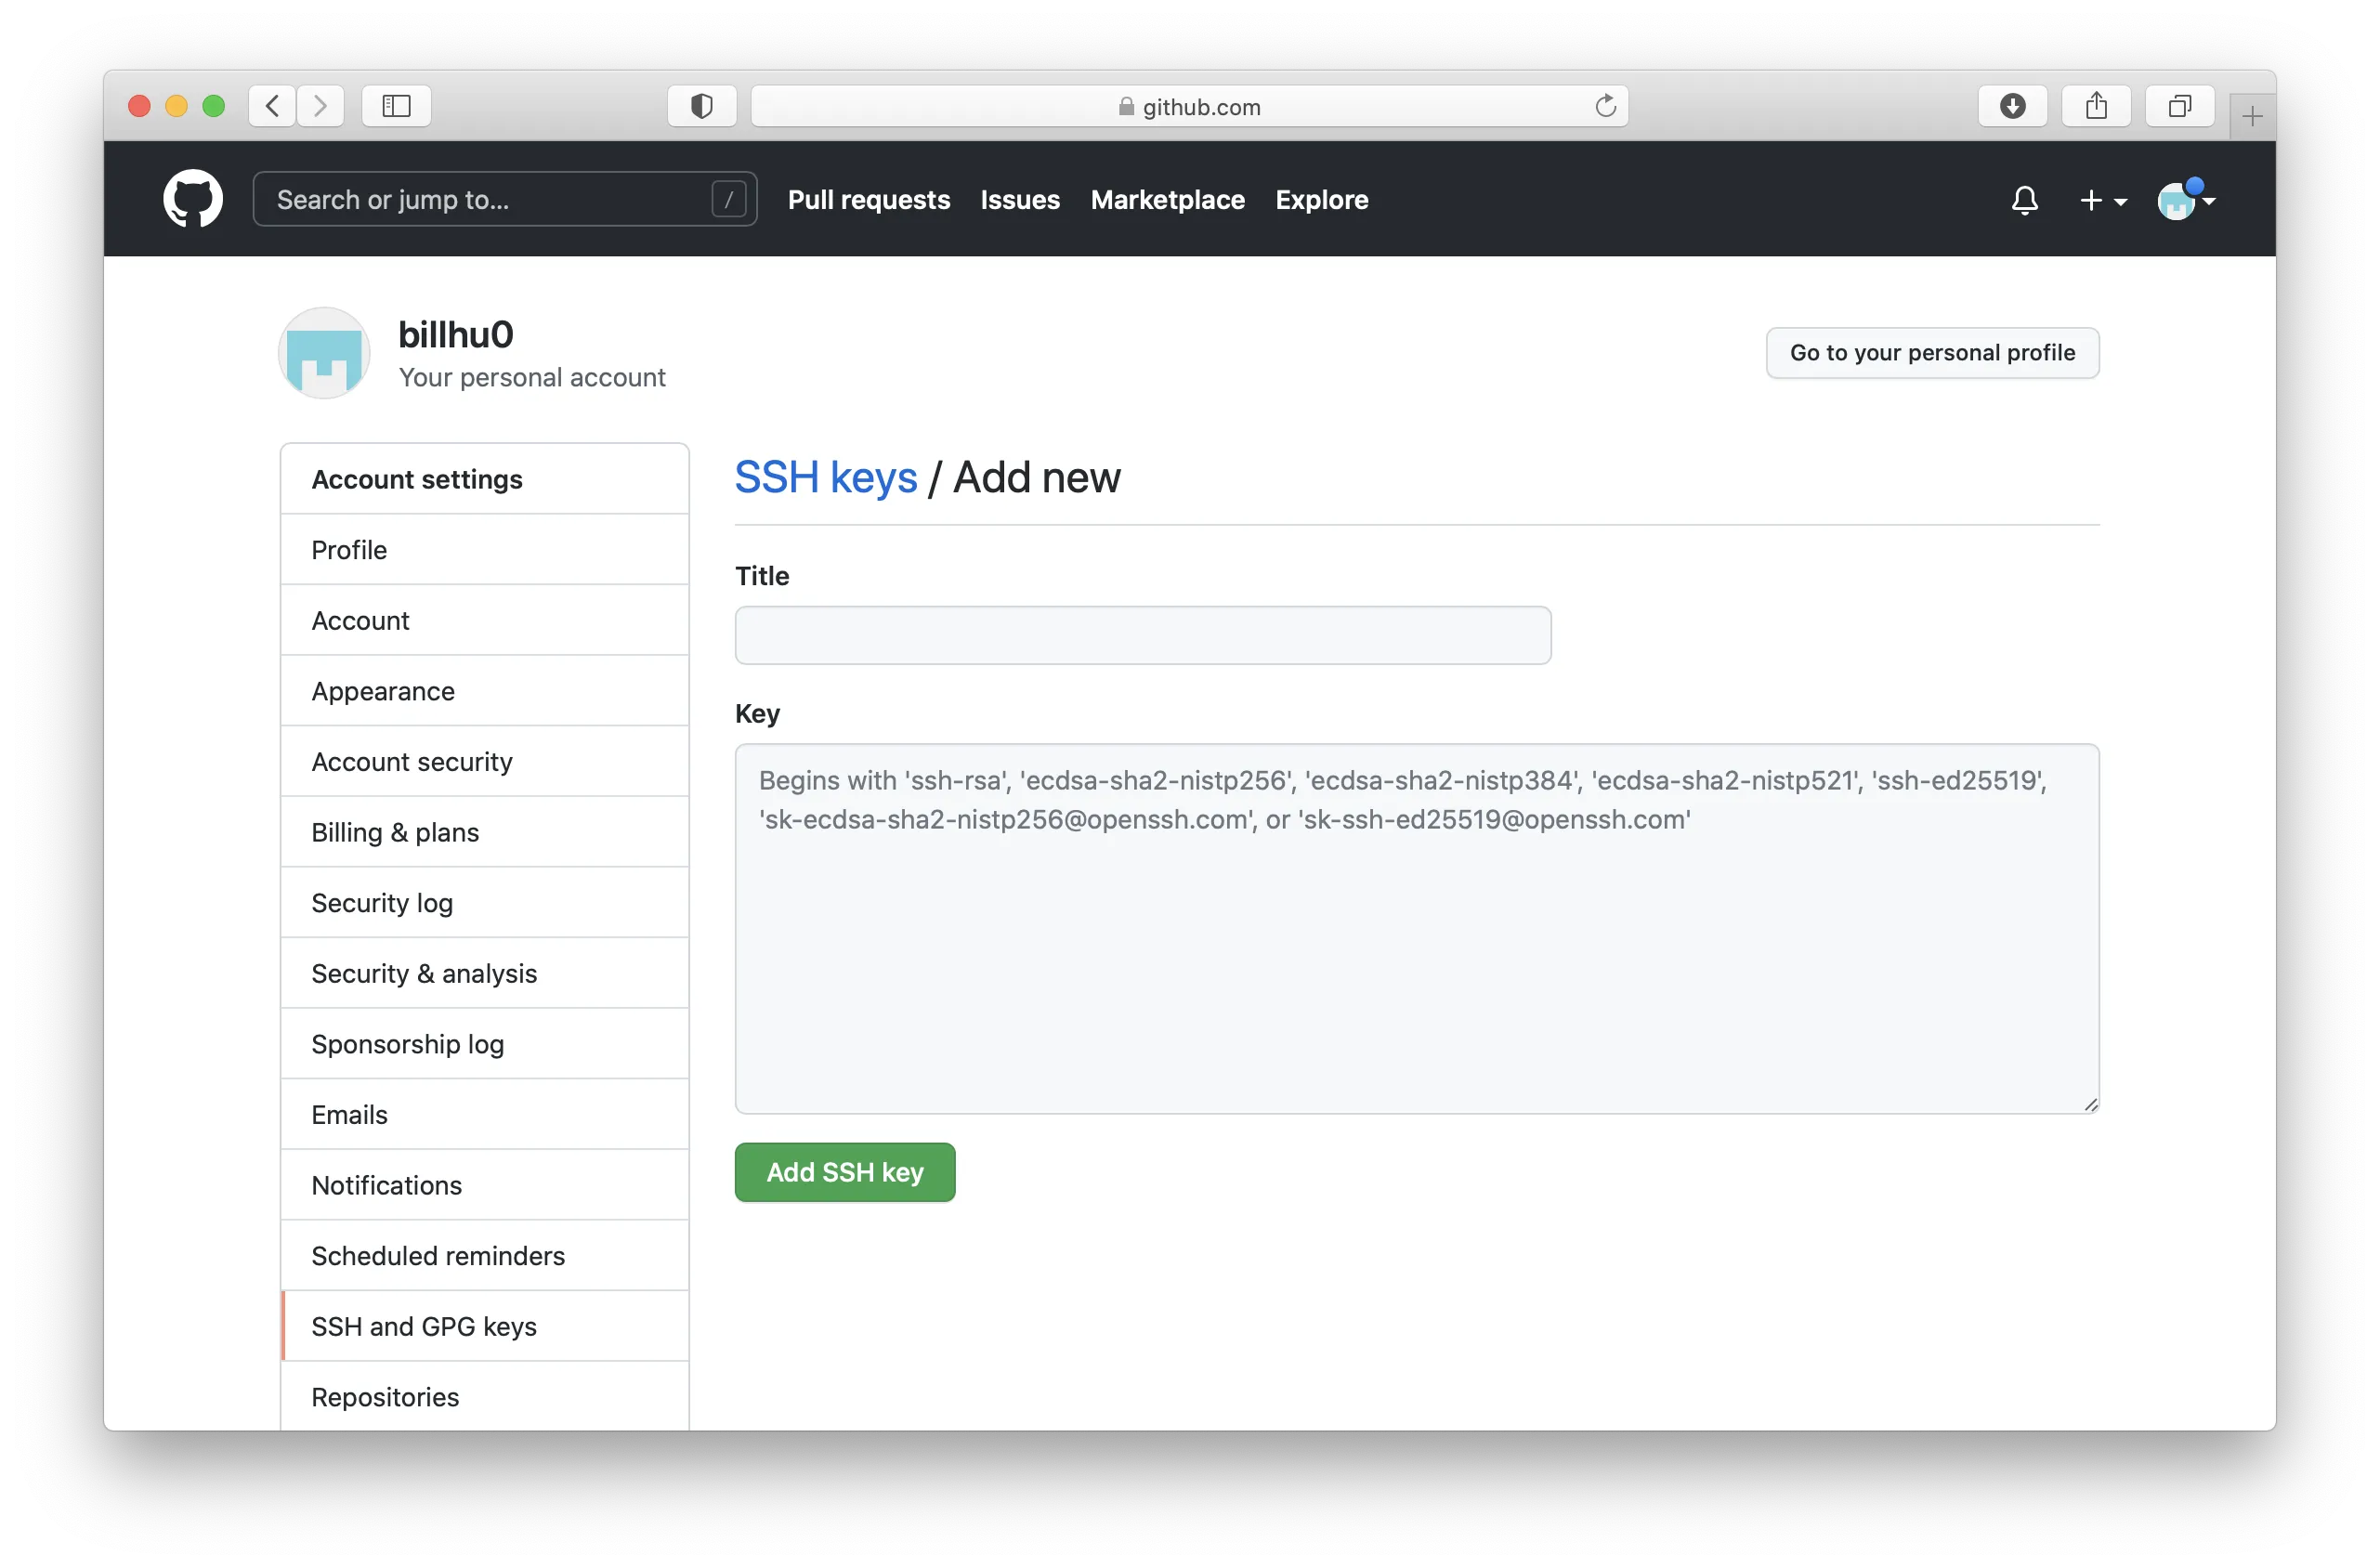
Go to GitHub website, Settings, select SSH and GPG keys on the left sidebar, and click New SSH key.
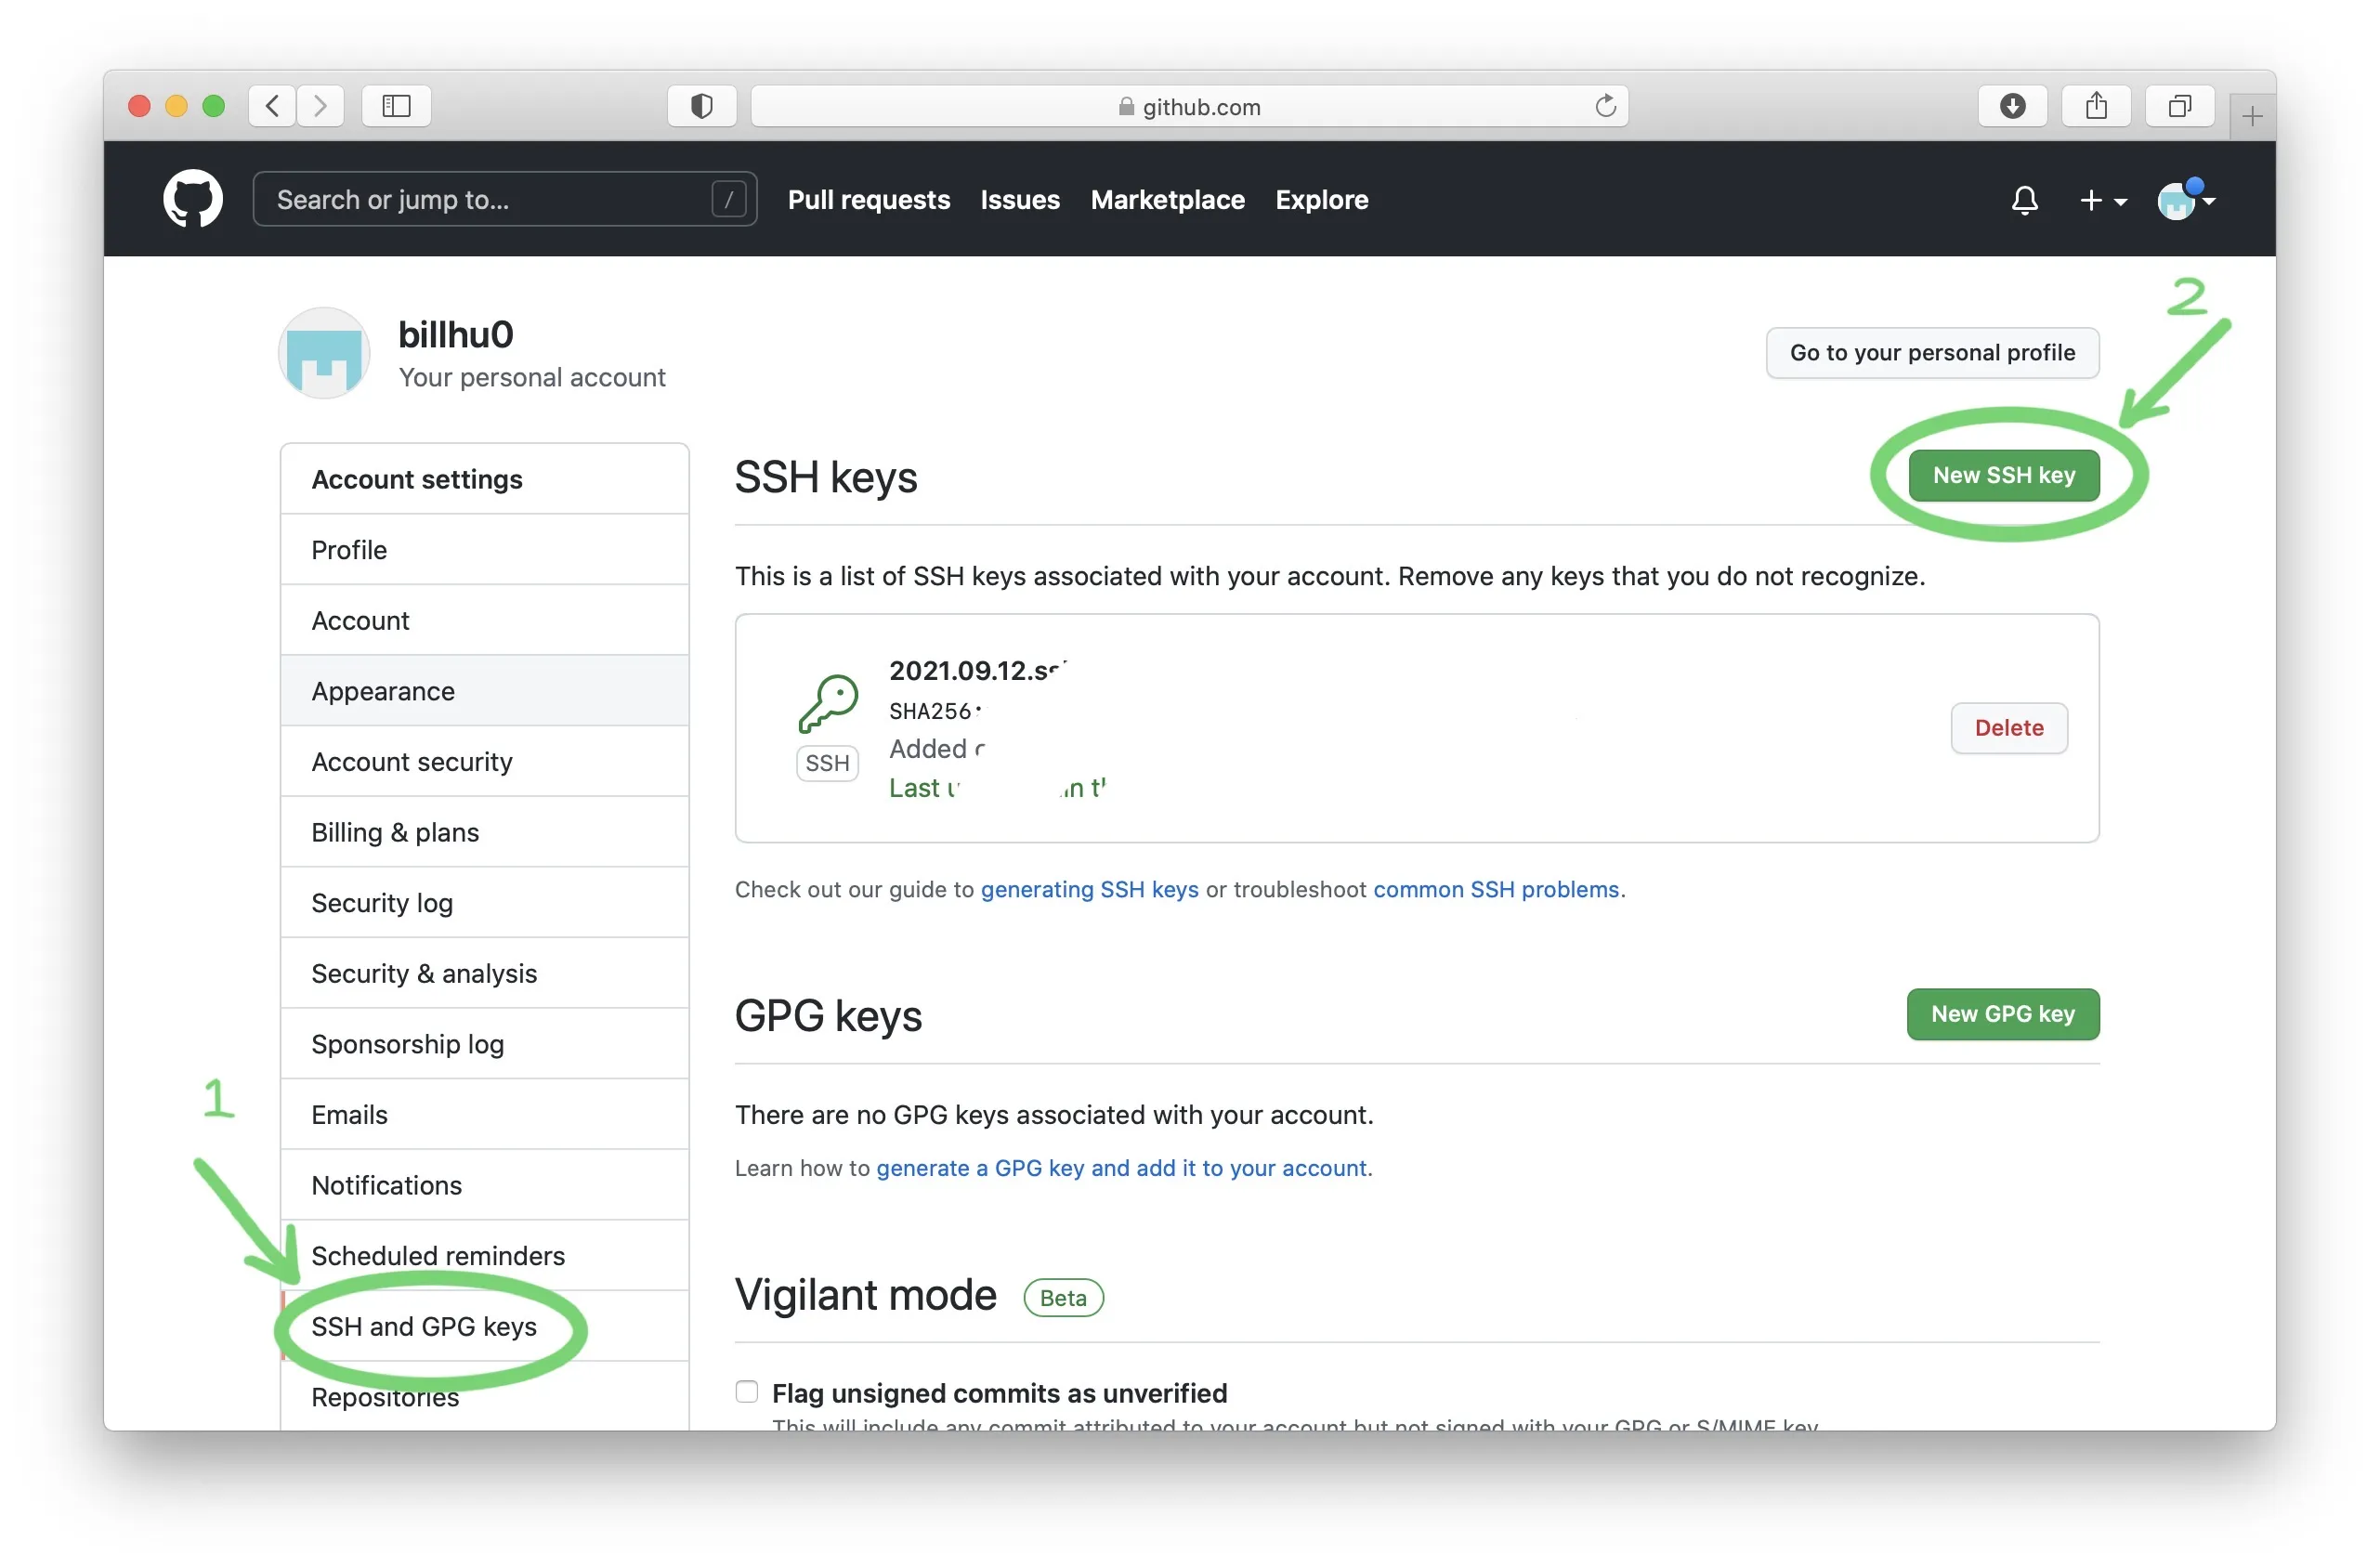
Choose a title (any title is OK), and paste the text into Key, after that click Add SSH key to complete the process.
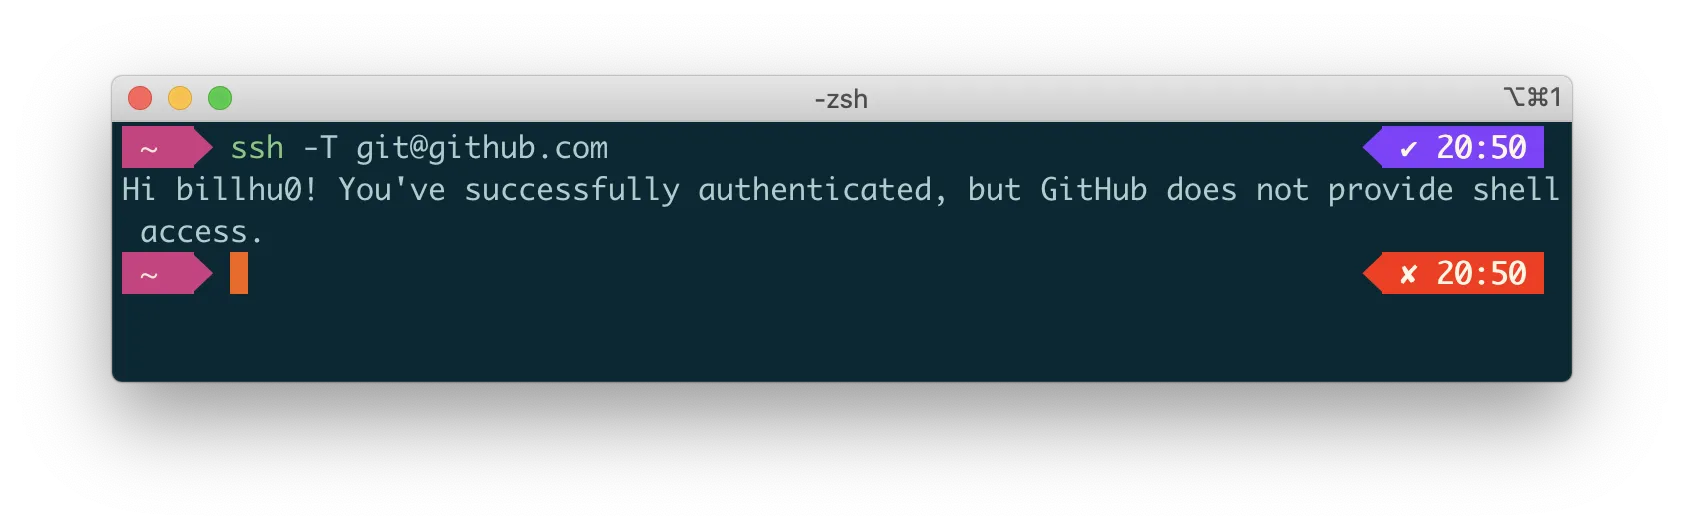
Finally, in terminal, run
1 | |
type yes when seeing 'Are you sure … ', and wait for responce.
Hi, xxx! You've successfully authenticated, ... means that the connection is successful.
Step 3. Create Github Pages Repository
On Github website, click the ‘+’ icon on the top-right of the toolbar, and select ‘new repository’.
Repository name: your_username.github.io, e.g, billhu0.github.io.
Mark the checkbox ‘initialize this repository with a README’.
Description: No need to write.
Your blog address is https://your_username.github.io.
Step 4. Build Hexo on your local environment
Install hexo with npm
In terminal, execute
1 | |
If you are in China and experience the low network speed, you can use tencent mirror source by entering
1 | |
Initalize hexo
Choose a local directory on your computer. In the future, almost every operation will be done in this folder, so you may backup it regularly.
In terminal, ‘cd’ to this directory, and run
1 | |
and wait until complete.
Preview your blog.
Now your blog has been created by hexo. Run the following command in terminal
1 | |
The hexo g command transfers your raw data (including posts, pages in markdown and other formats) into html, css and js files that can be viewed on web.
And hexo s can let you preview the website by visiting localhost://4000 with your browser. If the command fails, enter npm install hexo-server --save and try again.
Step 5. Deploy your local hexo to GitHub Pages
After testing your blog locally, you can now deploy it to the github repository you have just created, making it visiable to others.
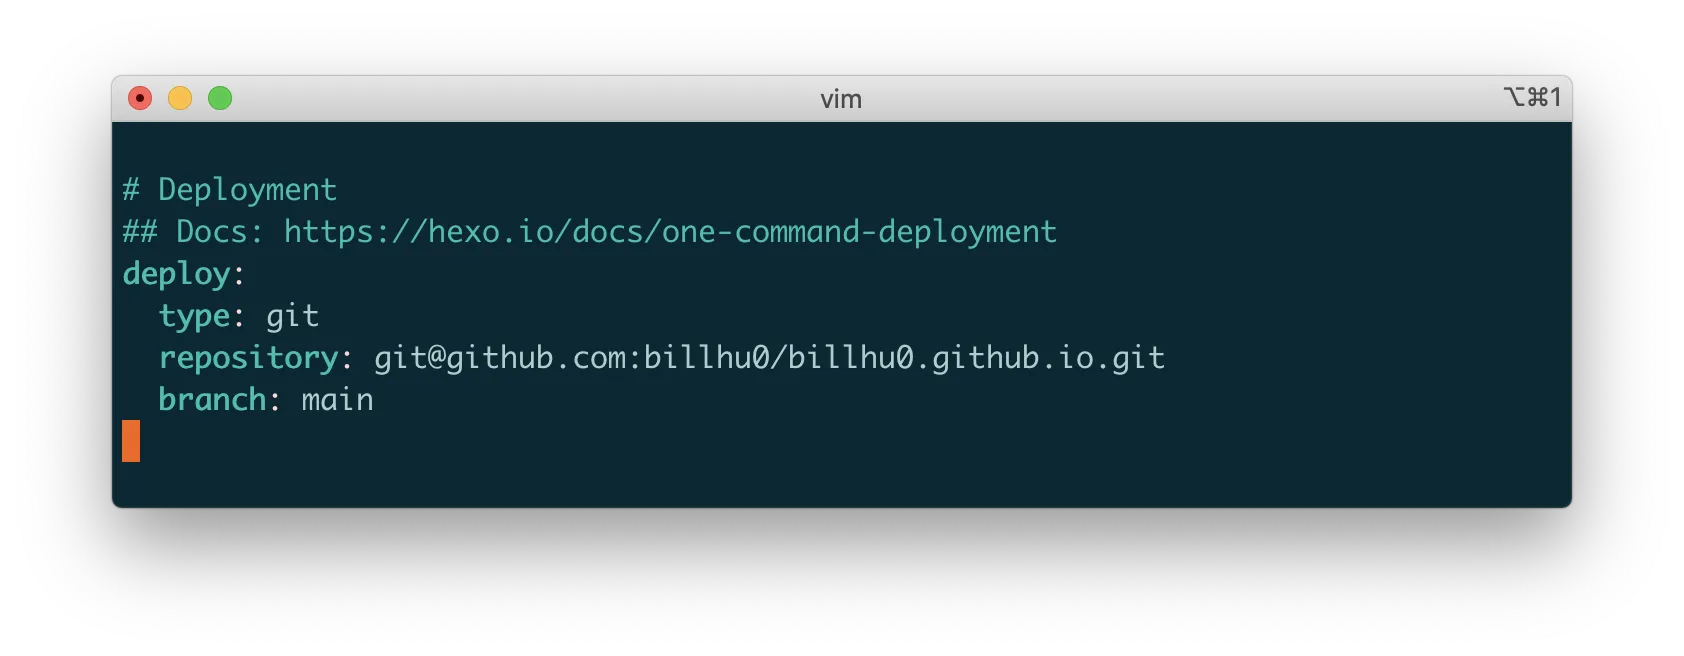
In terminal, run
1 | |
and go to the end of file ./_config.yml', modify the deploy part to the following
1 | |
And then run the following command in terminal
1 | |
Note that you can directly run a single hexo d, but to reduce the possibility of some small errors, you are suggested to run hexo clean && hexo g everyone before you want to hexo d.
Well Done! Now visit your_username.github.io and you can see your blog !