Skip TPM check when installing Windows 11
Download Windows ISO
You may download Windows 11 ISO from microsoft official website: https://www.microsoft.com/zh-cn/software-download/windows11.
If you do not want the newest version (for example, Windows11 21H2, 22H2), you may use MediaCreationTool.bat (Github link), where you can select ‘Auto ISO’ and choose a history version of Windows. See the README.md in the Github link for details.
Problem Description
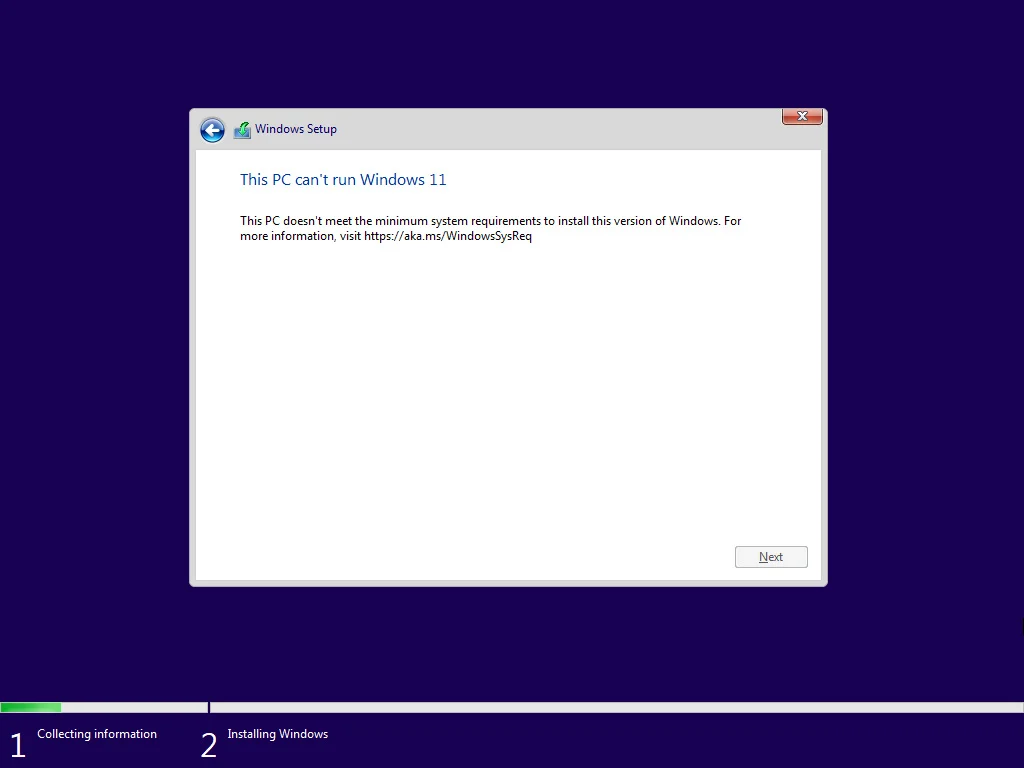
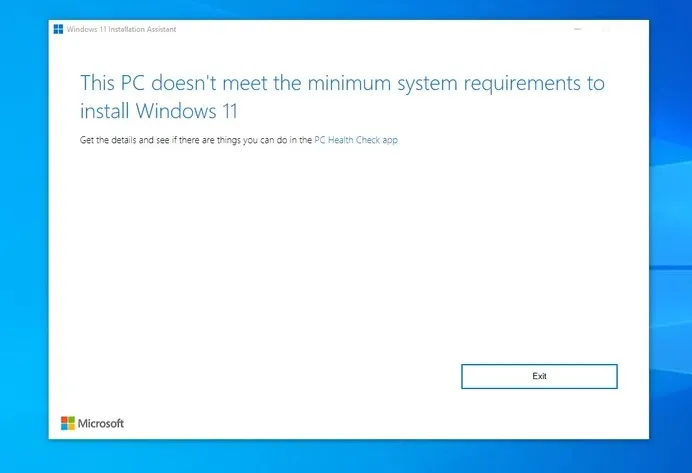
You may encounter ‘This PC can’t run Windows 11’ when upgrading to or installing Windows 11, like follows:
TL, DR: Use Rufus!
TL, DR: Use Rufus!
TL, DR: Use Rufus!
TL,DR: Using Rufus (Solution 4) seems to be the most convenient way.
However, if you prefer not to use any third-party software, there are also some alternative ways to do this. See below.
Solution 1: registry
If you are booting from Windows 11 install disk, use Shift+F10 to open cmd. Otherwise just open cmd (run as administrater).
Use cmd to execute the following:
1 | |
Or, if you prefer the GUI registry editor, use Win+R and type regedit. Navigate to HKEY_LOCAL_MACHINE\SYSTEM\Setup, create an item called LabConfig, and add the following DWORD values:
- key name
BypassTPMCheck, value00000001. - key name
BypassSecureBootCheck, value00000001 - key name
BypassRAMCheck, value00000001 - key name
BypassStorageCheck, value00000001
Then navigate to HKEY_LOCAL_MACHINE\SYSTEM\Setup\MoSetup, create a DWORD item with
- key name
AllowUpgradesWithUnsupportedTPMOrCPU, value00000001.
Save and exit. Like the following

Solution 2: Modify WIM property to ‘Server’
Use wimlib (the open source Windows Imaging (WIM) library) to modify the ‘image-property’ of sources\install.vim to ‘Server’.
Download wimlib and execute
1 | |
Look at ‘Image Count’ in the output, it should be a number.
Then execute
1 | |
Note that after changing to ‘Server’, you might be required to enter a product key when installing Windows. In this case, use sources\setup.exe instead of the setup.exe from the root folder of the ISO.
Solution 3: Use Windows10 ISO and replace install.wim
Download any Windows 10 ISO and your selected Windows 11 ISO image.
Uncompress the Windows 10 ISO, replace sources/install.wim with the install.wim in Windows 11 ISO. Then run the Windows 10 setup.exe.
In this way you are installing Windows 11 image with Windows 10 installer, so don’t worry if you see “Windows 10 installer”. You are installing Windows 11.
Solution 4: Use Rufus
Download Rufus, plug in an external U-disk and create a USB startup disk using Rufus.
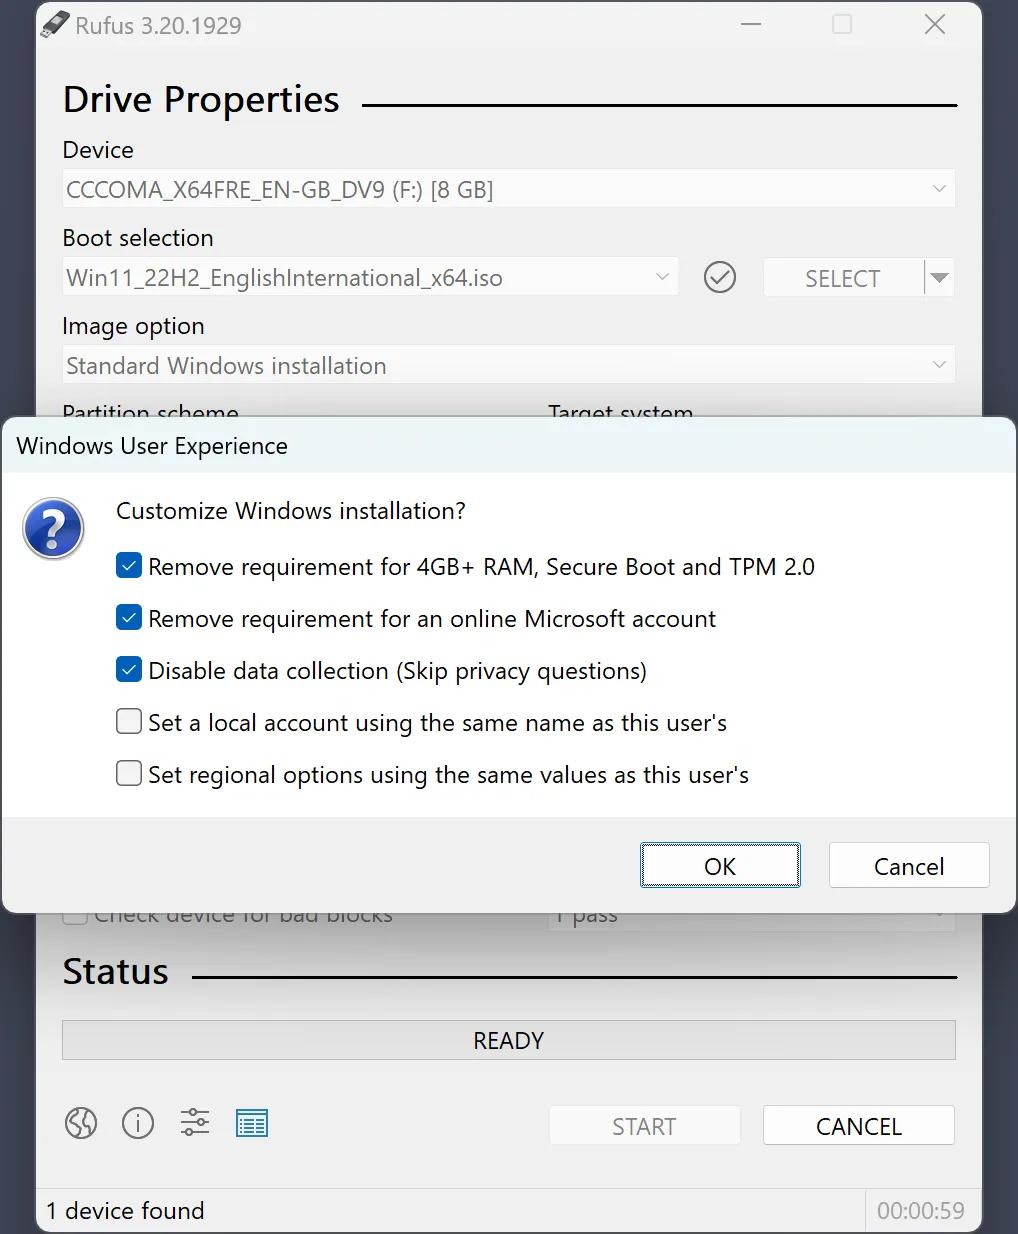
After that, directly run the setup.exe from your external U-disk.